share journal life experiences
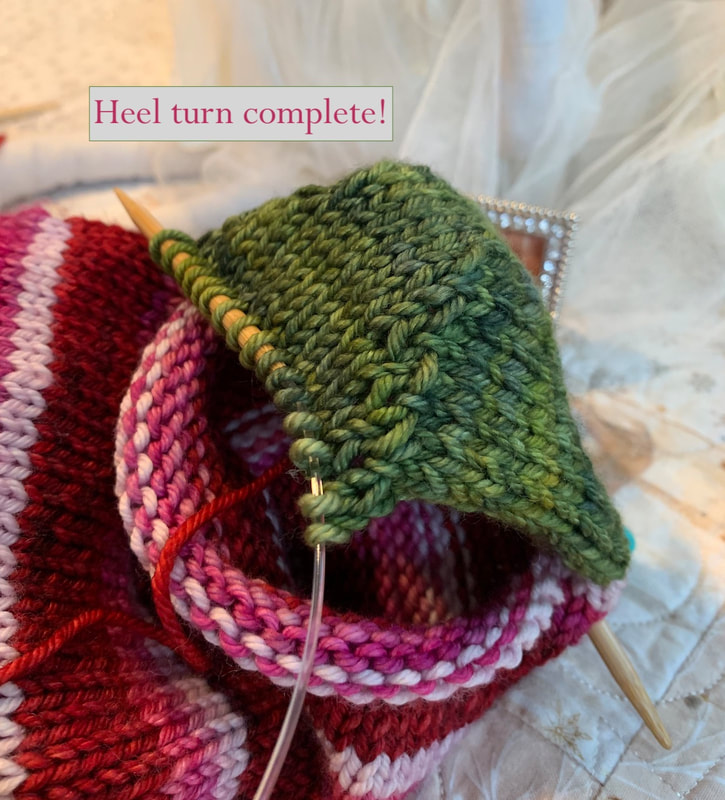
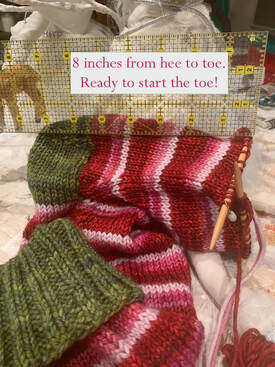
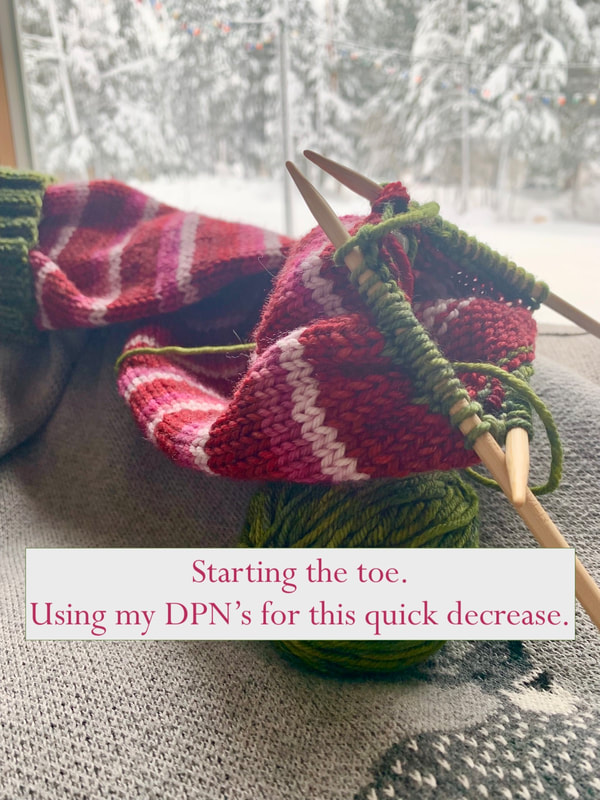
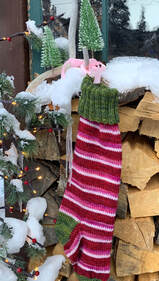
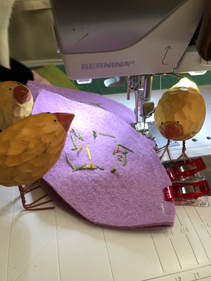
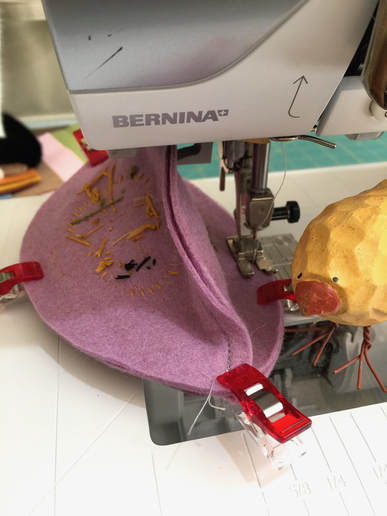
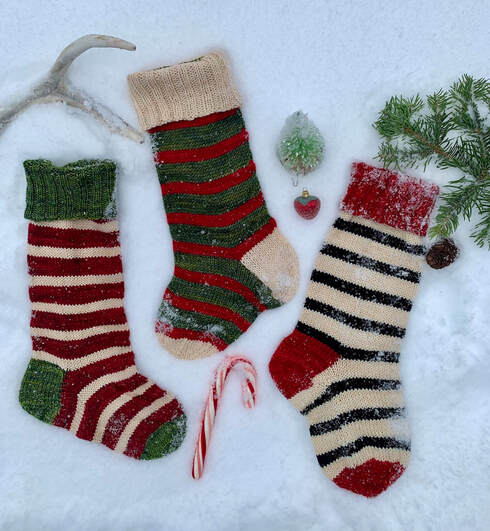 Follow along as I show the steps to knit the Cheery Christmas Stockings. If you have a couple days available this season, you will be able to get one of these done and it will be ready for Santa on Christmas Eve. Maybe he will drop off more yarn 🥰 In the tutorial, I was knitting on the 3 stripe stocking. This stocking used 4 colors of yarn total. Three colors for the stripes and one contrast color for the cuff, heel and toe. Have fun choosing your colors! I am currently making a blue variation of the 3 stripe stocking. I will post on the stocking page in a couple days. 3 different needles were used. US7 and US8 (or 9 if you knit tight) and US7 DPN's for finishing the toe. Gauge is not very important for this project. Finished stocking is 17 inches from cuff to heel. 11 inches from heel to toe. It was a cold snowy December day. Perfect for knitting. Three feet fell this weekend! I finished this stocking while snowed in. After storm started to let up, I had to get bundled up and spend hours clearing a path to get out. Good exercise after sitting for hours! Below are the photo's and a video of heel turn stitches. I hope you enjoy making this stocking as much as I did! 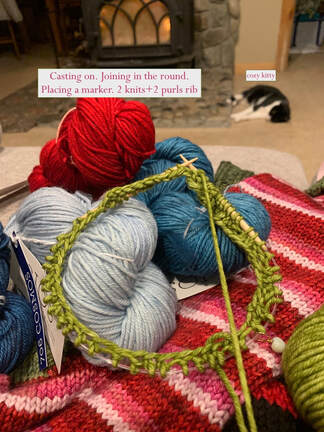 Casting on 60 stitches with green yarn for cuff. This yarn color will also be used for the heel and toe. Setting off the pretty Christmas red and pink candy stripes. Use the smaller US7 needle for the cuff. After casting on 60 stitches, place a marker to mark beginning of rounds. Make sure your stitches are not twisted on the needle! I check before I insert the right needle into the first stitch and again after I insert the needle into the first stitch. Then, I pull the new stitch for the first round. The cuff pattern is Knit 2, Purl 2 ribbing for 5 inches. 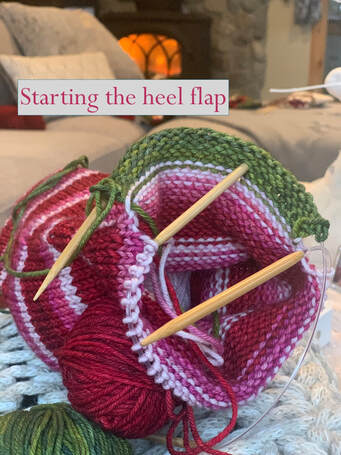 After finishing the 5 inches of cuff, the striping begins using the larger needle. In this photo, I have finished the striping for 11 inches. I am ready to start the heel. This is the tricky part of the stocking so I will spend more time on it. You can see I have two needles in use. The larger needle is holding the striping stitches. I used the smaller needle to start the heel. I am beginning my heel flap. I have added the green yarn for the first 26 stitches. I left the remaining 34 striping stitches on the larger needles AND kept the yarn alive. This means I have not cut any yarn colors. I stuck the three balls of red, pink, and light pink inside the stocking to keep out of my way during the heel portion. You may see a lump. The red yarn dropped out while adjusting for photo. Heel Turn. I have added a little video for you to follow. In this video I am on Row 5 (a knit row) and then turn to start row 6 (a purl row) I jumped into the middle so you could see the triangle gusset starting to form. Please pardon my working hands! I have been stacking lots of wood and finishing some pottery gifts (shh..)
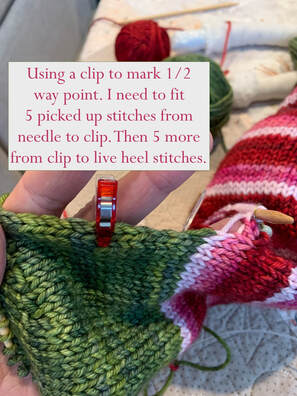
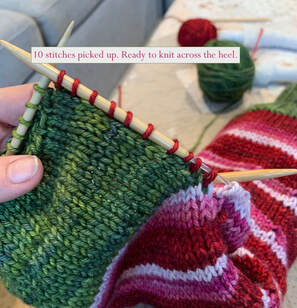
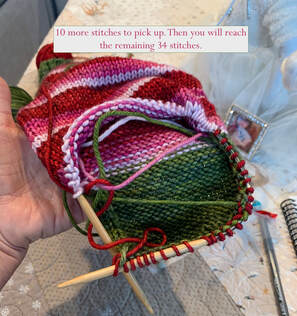
The next photo's show the picked up stitches. This is always a bit confusing. Turning the work, figuring out where to start. There are 4 needle points, different colors of yarn. Ack! It can be a bit confusing. I hope these photo's help you find where to start, what stitches to work back in and complete a round circle once again.
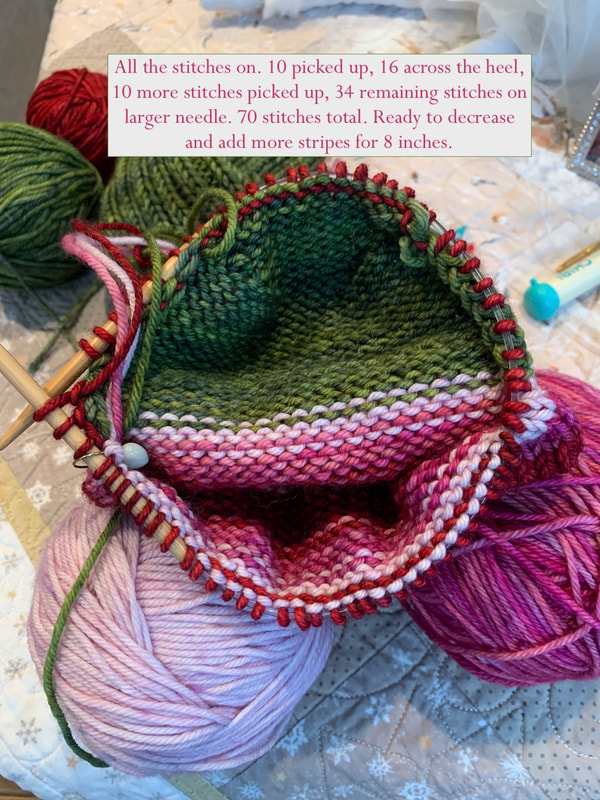
Using the needle holding the pink yarn, use red yarn for next stripe, pick up 10 stitches along heel flap. I like to mark with a clip the mid point so I can evenly divide the 10 stitches. After 10 stitches picked up, you are at the heel stitches on the smaller needle. Knit across those. Now you have 34 pink stitches, 10 picked up stitches, and 16 heel stitches. Ready to pick up last 10 stitches on the other side of the heel flap.
2 Comments
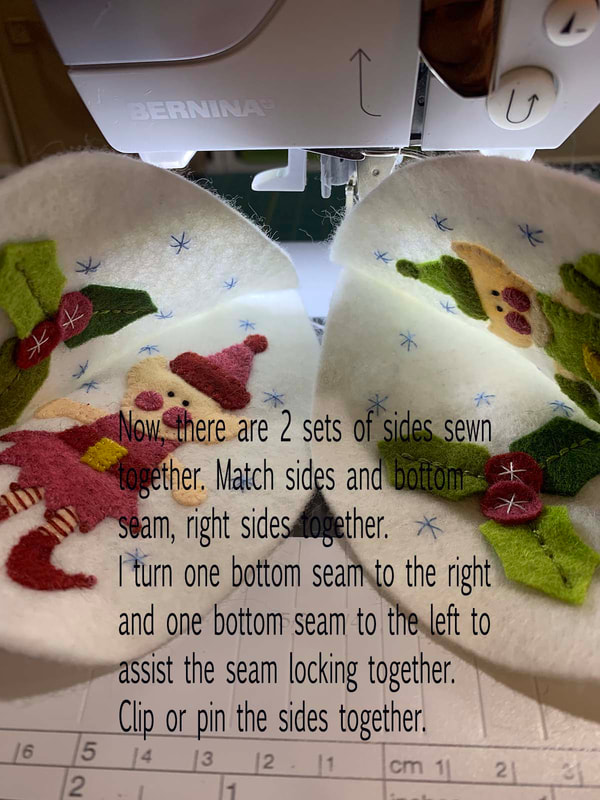
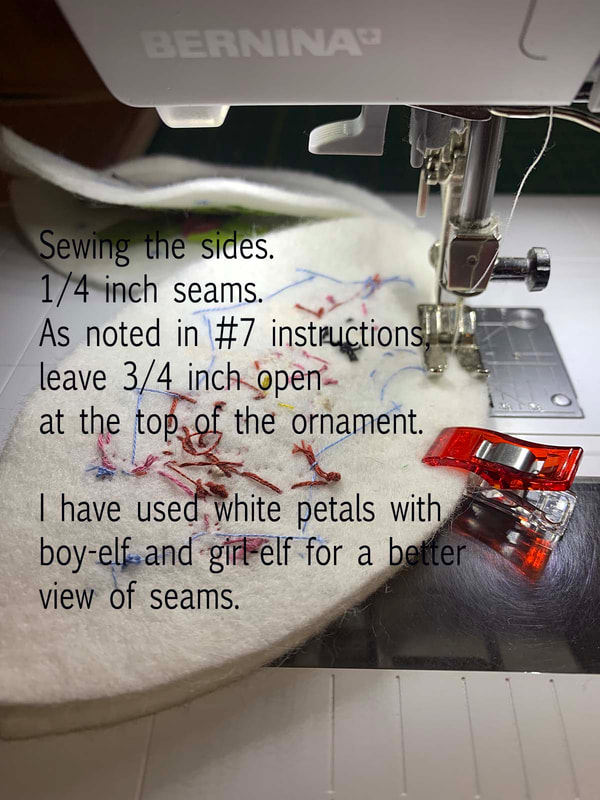
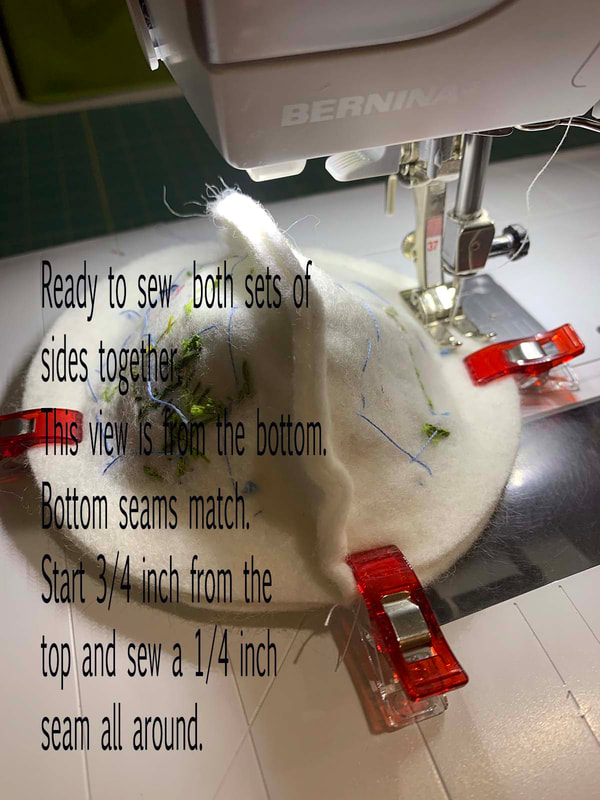
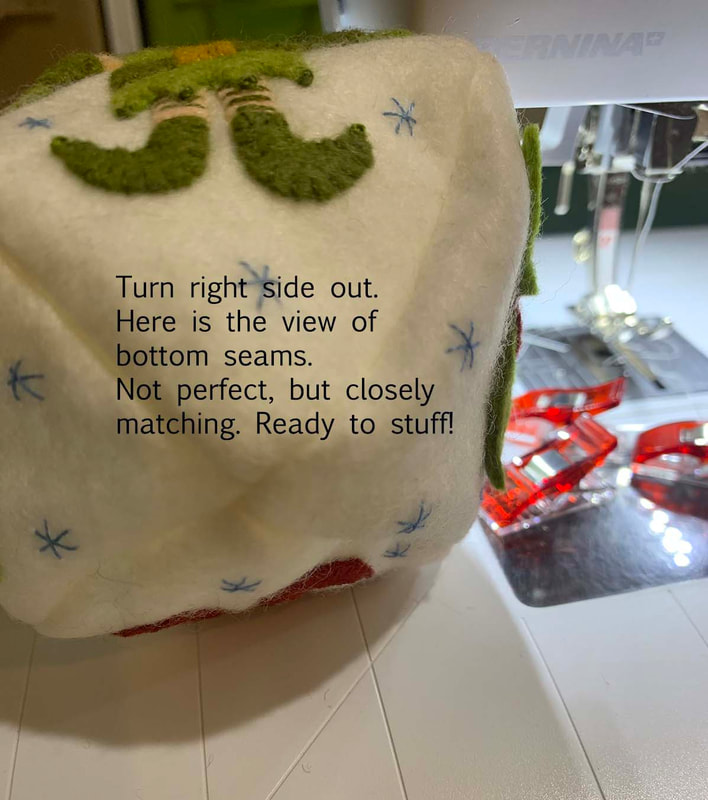
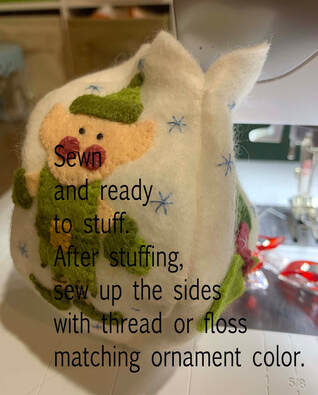
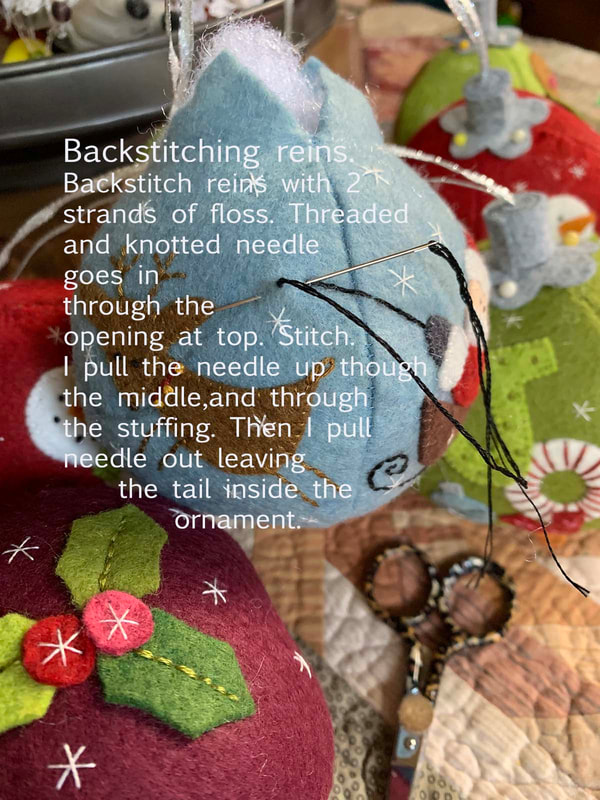
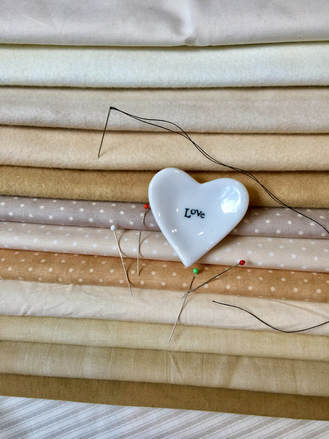
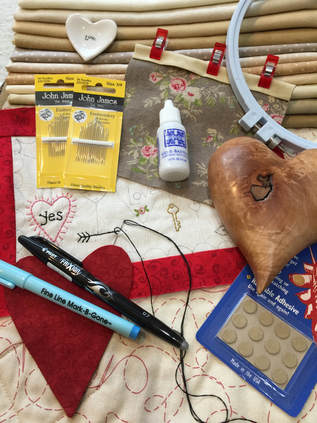
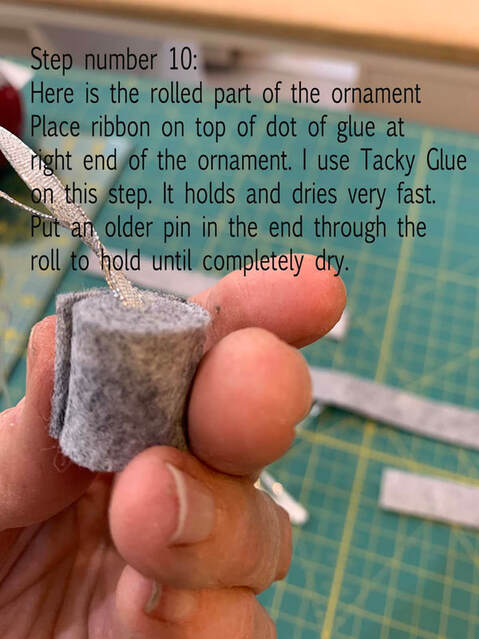
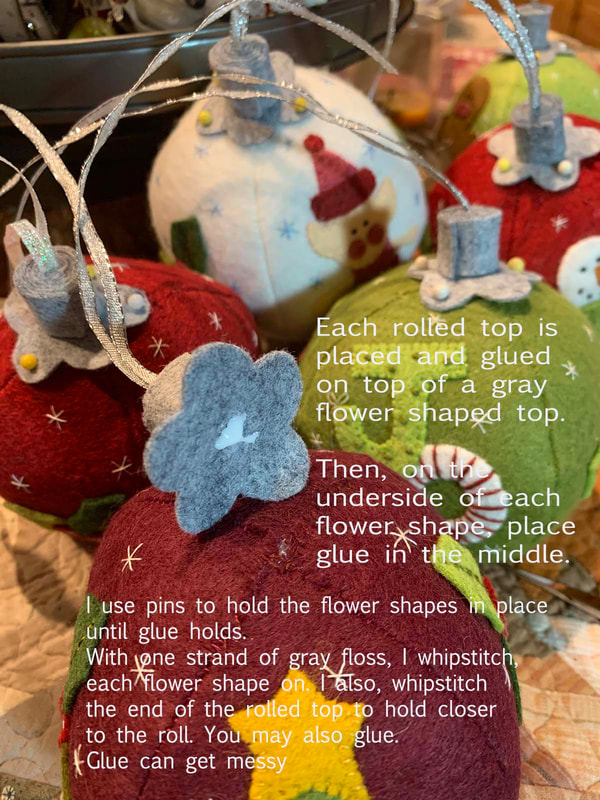
 I have assembled some tips and hints for making Everything Nice Christmas Ornaments. I enjoyed making these very much. They are easy to make but, I have discovered a few hints for making them even easier. I have hints for Sweet Stitched Easter Eggs in an older blog. Easter Egg hints cover freezer paper template making and appliqué. This tutorial covers in more detail sewing and finishing the ornaments. Follow along. I hope these ideas help you become a confident maker. Barri Sue Gaudet 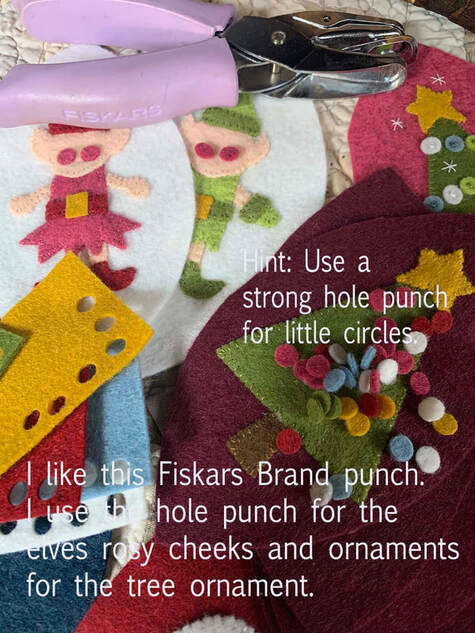
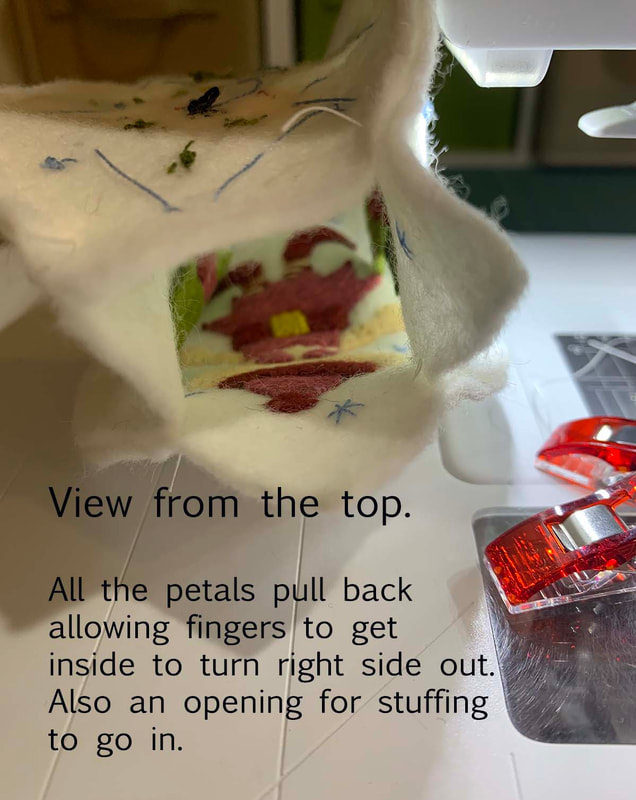
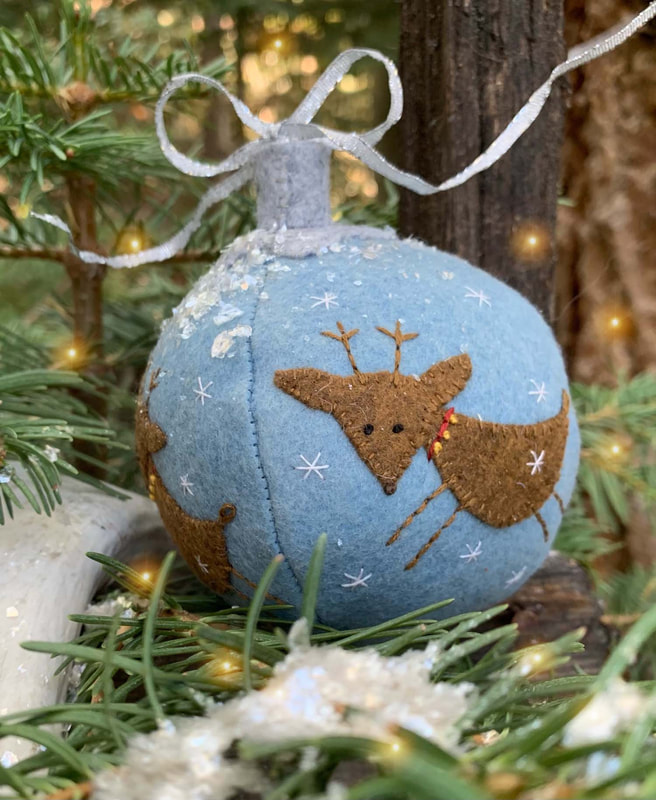
  In the photo of the finished Santa and Reindeer Ornament, you can see my stitches closing up the end of the rolled part
of the ornament top. I prefer stitching the rolled end to glueing. These ornaments are fun, and versatile. I hope you enjoy making these and creating many different variations. Look for more for designs coming in this 2022 Christmas season. :) Enjoy!  From time to time, we see sewing rooms, sewing organizers and creative ways stitchers, knitters, and sewers store their stash. It is always fun and creative to see the fun ways people use large sewing rooms, small dining rooms, kitchens, and closets. I started out as a young wife with a tall shelf in the corner of my bedroom. My Pfaff was on a folding table. Eventually, I would move the sewing machine to the dining room table. This worked out well for a very long time. I remember the dining room is where my mom did her sewing. We kids would be sent to bed and now I know she would stay up late sewing. In the morning there would be a dress hanging from our dining room overhead light. I remember a particular dress very well. It was blue velveteen with chiffon sleeves. And it was for me. I had picked it out of the Simplicity or Butterick book and it was my dress for the first day of school. By far the prettiest dress I ever had until my Prom days. By 15 years old, I was making my own dresses.
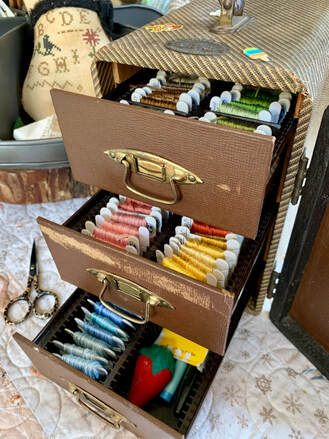 Where I keep my floss is a special story. I was going to try to sell my little patterns at a retail sewing show (around 1996?) in Phoenix, AZ. I was single and trying to support myself and my boys. I was going to meet my friend Kathy Campbell of Heart to Hand there with her husband. She asked for my cell number. I didn't have a cell phone I told her. (I couldn't afford one.) She and her husband Bill, insisted I drive and follow them the whole way. That I would never be alone. I received so much help from them during this trip. I will never forget it.
The show was fun and successful. We left Phoenix and to an Antique Mall Kathy liked to visit. She has the best flair for design in everything! I found a little slide case. I loved it and wanted it for what? Kathy said, embroidery floss bobbins! This is exactly what it became. This little slide projector case makes me feels creative and loved. It has been with me for 25 years. Now, it is opened, sticker decorated, teaching colors and carefully petted by my "Darling" Harlin granddaughter. And I finally received a cell phone. An amazing gift from a caring friend. As if the things we make aren't memories enough, sometimes the items we use to make these memories keep our hearts full.  7/21/2020
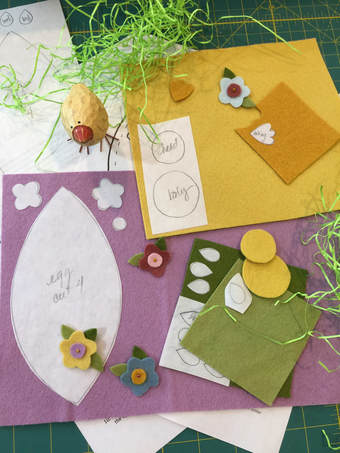
 Happy Spring! Time for sweet colors and sweet stitches. In my corner of the world we just received our biggest snow storm of the season. I have four feet of beautiful new snow in my yard. We welcome the precipitation any time it comes in California! Springtime is my favorite. The colors, the flowers and all the cute little baby animals associated with it! I put all my loves into these sweet little stitched eggs. Thank you for the many comments and emails from all of you. Often, they are questions on how to do techniques. So, I have decided to add some how-to's to my blog. Today, it will be Sweet Stitched Easter Eggs! These sweet eggs are fun and easy! Follow along below, and I hope you learn something new! 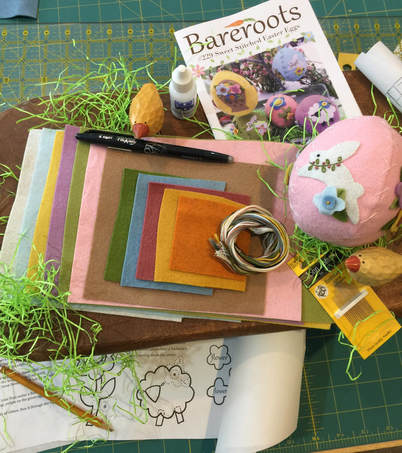 Step One. Collect your supplies. I have a kit available on this site that contains all the wool felts and floss. There are still some extra's you need: Embroidery needles, freezer paper, glue, pen (with removable ink is preferred, I like a Frixion pen for wool felts), pencil, stuffing, and wonder clips are a big help! 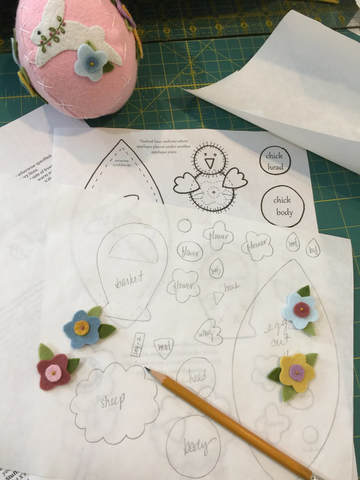 Step Two. Trace all the motifs onto freezer paper. Trace on the dull side of freezer paper with a pencil. Each freezer paper template can be reused up to five or six times so trace extra egg shapes, leaves, and flowers. One each of the motifs (lamb, chick...) will be enough all the eggs.
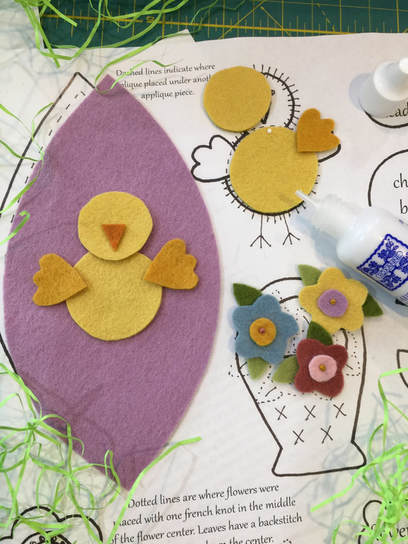 Step Four. Glue. You need four egg petal shapes for each egg. So there are four sides. I put a flower cluster on opposite sides of the egg and a motif on opposite sides. You can change this up of course! This arrangement will be in the example used. In this how-to, I will be making a chick egg. One great hint I can share here is shown in the example. I always include the finished design in my pattern pages. This way, you can use this pattern page to build your chick or lamb. Put your pattern page right onto your ironing board. Then I put the body of the chick on the pattern page, then I add a small dot of glue where the head and wing will overlap. Place these shapes onto the body matching the outside edges of the head and wings from the pattern page. Then I hit them with the iron to help dry the glue. At this point, I scoot them of the pattern page and build another chick in the same manner. After the second chick is done, I can pick up a whole chick turn it over add a couple spots of glue and place it on the egg shape. Let the glue dry before starting step five. 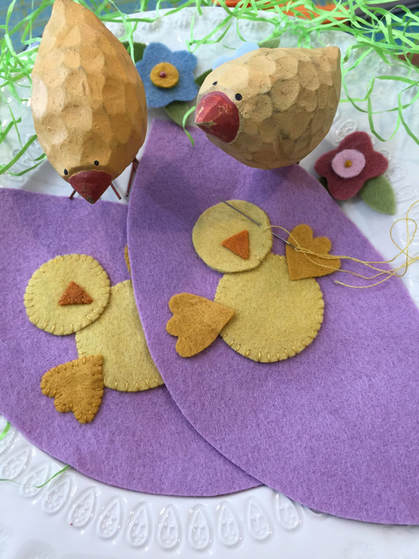 Step Five. Whipstitching. I whipstitch all the motifs in place. I use one strand of floss that matches the wool color I am going to sew in place. I do not do a blanket stitch. You can if you want but it is not necessary. I let the pretty wool felts or wools be the star and delicate light whipstitch holds them on. In each pattern is an example of how to do the whipstitch. Note: On this pattern I do not whipstitch the flowers or leaves. They are held on with french knots and backstitches. See the next step... 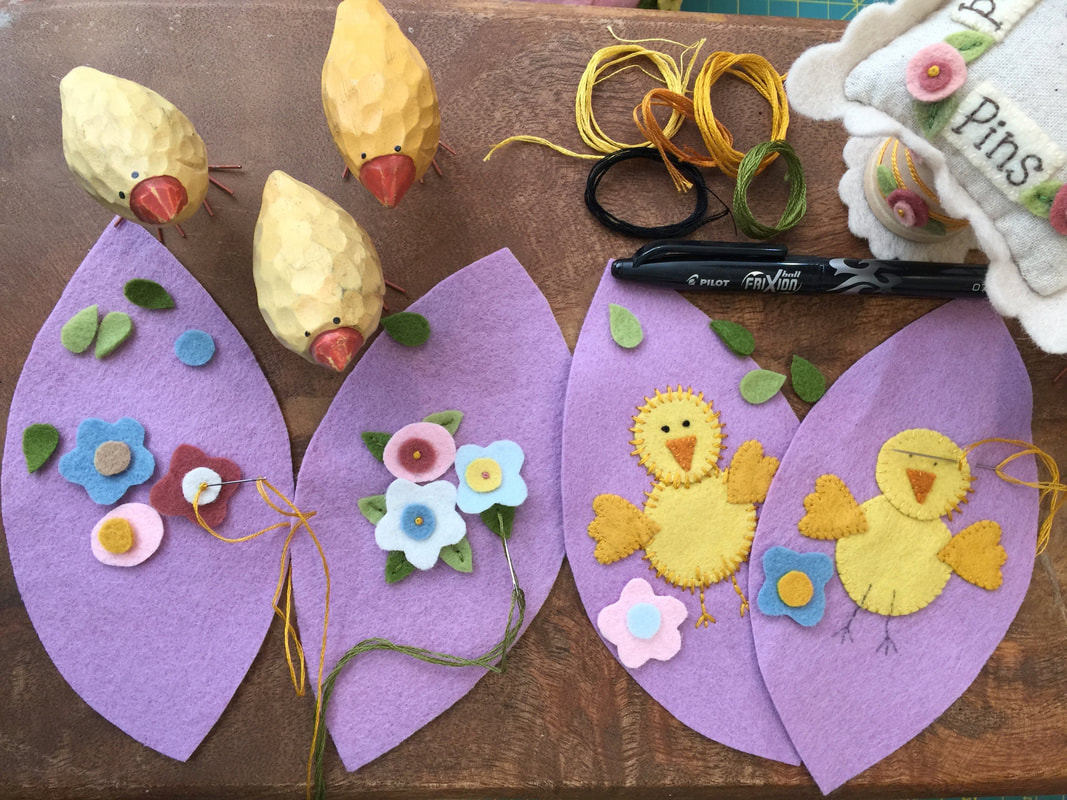 Step Six. Embroidery. I use three strand of floss for most of my embroidery work on wool felts. The wool felts or wools tend to absorb the stitches so I use more strands and do not pull too tightly so my stitches stay on top of the wool. Most embroidery on the wool felts is simple. So I recommend drawing your embroidery lines by your own hand. No need to trace. If you use a removable pen ( Frixion - heat removable or, blue water removable pens) you can take your bad lines off and re-do! The flowers all get a french knot in the center to hold them down The french knot is three strands and I wrap the needle three times to make a significant knot for the center of each flower. The leaves are backstitched veins holding them on. Just tuck a leaf under the flower and back stitch in place with three strands of green floss. Eyes on my little characters are three stranded french knots in black floss but only two wraps of the needle. The eyes tend to get leaning if there are two many wraps. I like my eyes to be tight little perfect knots. When embroidery is done, remove your guide lines.
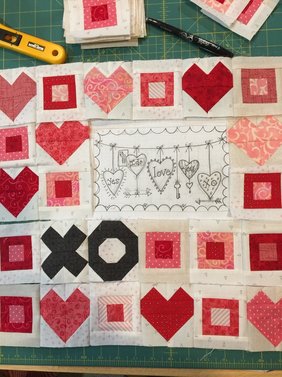
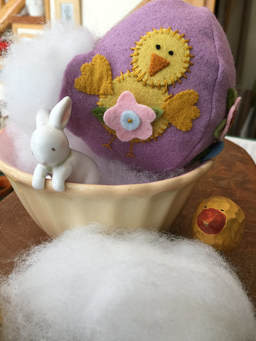 Step Eight. Turn and stuff. Turn your egg inside out. Being careful not to catch embroidery threads and pulling on them. I always check before stuffing in case I have pulled on a french knot and it needs a little touch up! Stuff with small bundles of stuffing at a time. While stuffing, I am kind of shaping the egg as I go. When you have sufficient stuffing, Turn the raw edges into the stuffing and sew closed by hand with a single strand of matching floss. 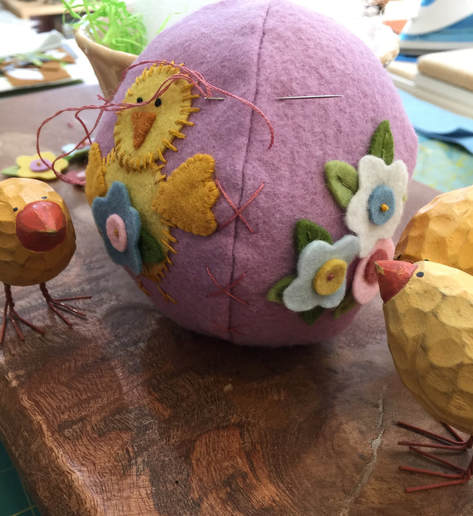 Step Nine. Finishing With two strands of floss I made big X's down the side seams. I thought it gave fun little extra stitches. You can make it more fun with crazy stitches going down the sides! I hope these sweet stitched eggs make you smile and reading this how- to helps you feel more confident to create and fill your home with sweet spring things! Happy Stitching, Barri Sue 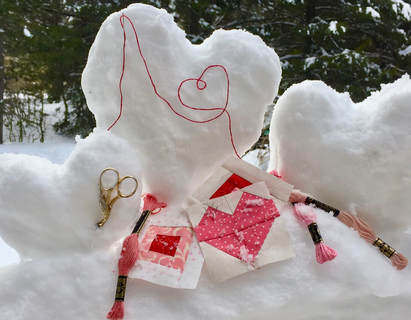 Happy Valentine's Day to all you fabric lovers! I decided months ago to fall involve with fabric again. I thought about how a few years ago it seemed I was having a secret affair with fabric! I would plan time around her (I can't tell you why fabric is a female, but she is in my heart), I would sneak in alone time with her, and pine away for vacations with her and my girlfriends! When I started a little pattern design company and then ultimately Sierra Cottons & Wools, I found fabric starting to add a little pressure. She was becoming a responsibility in my life. I still got a pitter-patter in my heart when I saw a new line of fabrics, but I began to worry about sales and need rather than how she made me feel. So easy how we let work take over our lives. These past few years have been filled with new added responsibilities. Fabric was absolutely not in the foreground of my thoughts. I even considered a new occupation? I was missing my husband. A companion. And I was feeling quite unlovable. Then I remembered how I used to love fabric. I used to have to be called from my sewing room to join my husband for some activity. Ugh! So frustrating. Just one more stitch please. I knew I had to fall in love again. All over again. With fabric.
So, I began dating fabric again. I remembered how she filled my mind with new ideas. Exciting things to be made. Fun with friends in sewing groups and excursions to find new amazing projects. Fabric fills my heart and time again! Today, I can say, I spend lots of time in my sewing room. Fabric is there to greet me in the morning and there to say, "Goodnight, good work Barri." in the evenings. My heart is filled with joy and appreciation.
 Welcome 2018!
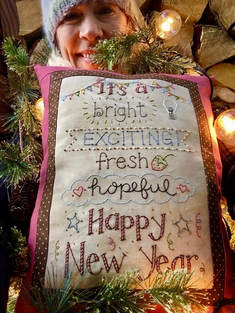
I am energized and sewing and knitting fiercely! Lots of new things going up in the shop. Lots of new fabrics to sew with and new yarns to tangle with! I am starting the new year with a stitchery gift to you. This cute stitchery pillow is a free download on the site. Visit the Newest Things or the Downloadable Patterns pages to find this pattern. You can be making it today! I am awfully proud of myself as I so prefer having a needle in my hand rather than a keyboard at my finger tips. But, I persevered last year and am proud to say, there are lots of patterns to download on the site. I am finally liking and understanding the tech work! The shop is looking rather furry this winter! Faux fur is everywhere including SCW! We are full of fur pom-poms for hats and things and lots of new fur Minkee/Snuggle. I cannot pass it by without giving it a pet and am dreaming of new ways to use it! Keep checking our Facebook page and Instagram page to keep posted on how fur will show up! Kinda purr-fect for Valentine's Day maybe? Sierra Cottons & Wools is looking forward to a new year full of new cozy warm and wonderful things! I hope your new year finds you loving, laughing, stitching and visiting the mountains! Happy Stitching, Barri Sue
   A new year marks a new beginning. New hopes, dreams and wishes and for Sierra Cottons & Wools' new stitches! My New Year hopes are that you are a friend of the shop, enjoy reading this blog, and have fun following the shop here and on our facebook and instagram sites. I hope you share my journey and my walk through navigating businesses, social media sites, creating new designs, and life as an independent woman in the Sierra Nevada. Also, I hope this blog will encourage you to sew, knit, crochet, applique, embroider, love fibers, love color, and especially love what you make. My New Year's wishes are that you and I are encouraged to make new things, to try something new, to face new challenges with strength. I will do my best to bring you exciting new ideas in the sewing and knitting world. I promise to try new adventures in sewing, traveling, friendships, and grandmotherhood. I will face this challenging opportunity of opening up my world to you with excitement. Here is a little story about me, I thought about having a shop soon after I moved to the Eastern Sierra. I wanted to meet friends and creative people who loved stitches as much as I did. My dauntless husband pushed me forward until it was a reality. I still remember us driving on 395 tossing out names for the new little business. I couldn't have imagined then how much I would need all of you now that he is gone. My heart is so thankful. Now that we are on this journey, lets get our needles and floss ready for New Year Stitches! I have a new block of the month I have been making for my company Bareroots Designs. Twelve new little quilties each with there own little stitchery. Here is a peek at February. You may sign up for these by calling the shop (760) 872-9209 The Block of the month cost is 24.00 and it includes a pattern, fabric for the quilt top and floss for the stitchery. These will be ready to send on February 1st. There are more Block of the months to add! I will post here and on our social sites. So now in this bright and shiny new year I will face the challenge. I will write, design, create, sew, stitch, knit, package, kit, find and make new things, and bring them here to you. I hope you will comment, share, create, and visit often. I am ready to see what my heart and hands can do. Happy New Year and New Beginnings, Barri Sue Gaudet Sierra Cottons & Wools/Bareroots Designs ' |